NOTE: This is not an Introduction to ESP32. I made a dedicated Getting Started with ESP32 tutorial. If you are a beginner, please read that tutorial first before proceeding with this Programming ESP32 with Arduino IDE tutorial.
Have you Installed Arduino IDE?
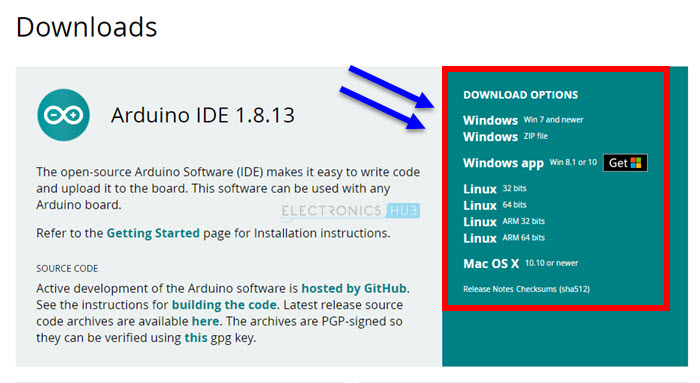
The first thing you need is the Arduino IDE. If your computer doesn’t have Arduino IDE installed, then visit the official Arduino download page and download the installation file for your preferred operating system.
If you have already installed Arduino IDE, then make sure that it is up to data.
Preparing Arduino IDE
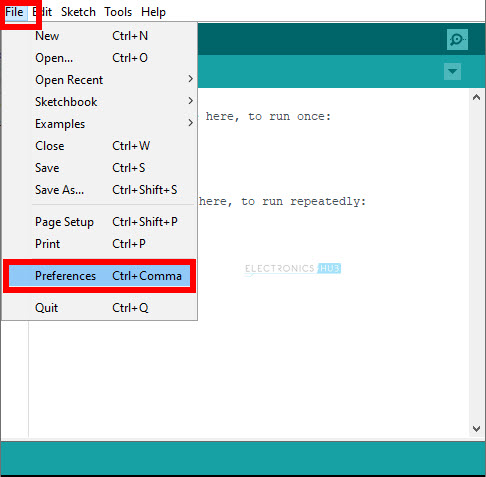
Open the Arduino IDE and go to File -> Preferences option.
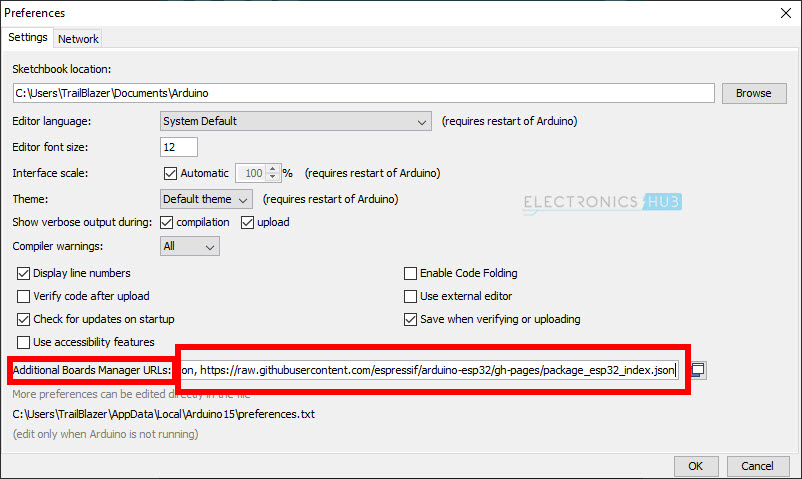
A new window pops up. Near the end, there is an option called “Additional Boards Manager URLs”. In the space next to this option, paste the following URL and click on OK.
NOTE: You can add multiple URLs by separating with commas. Arduino IDE will now look for additional boards (other than that are already installed) from the above URL.
Installing ESP32 Board in Arduino IDE
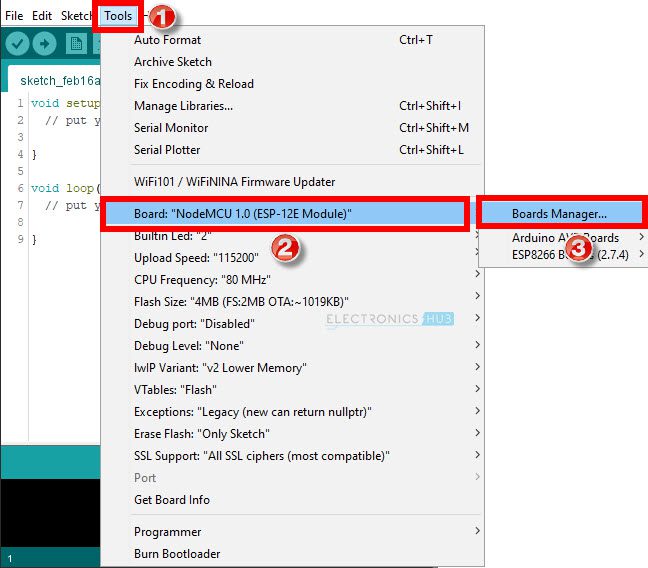
After adding the URL, you are now ready to install the ESP32 boards in Arduino IDE. Go to Tools -> Board -> Boards Manager. . . option. A Boards Manager window will pop-up.
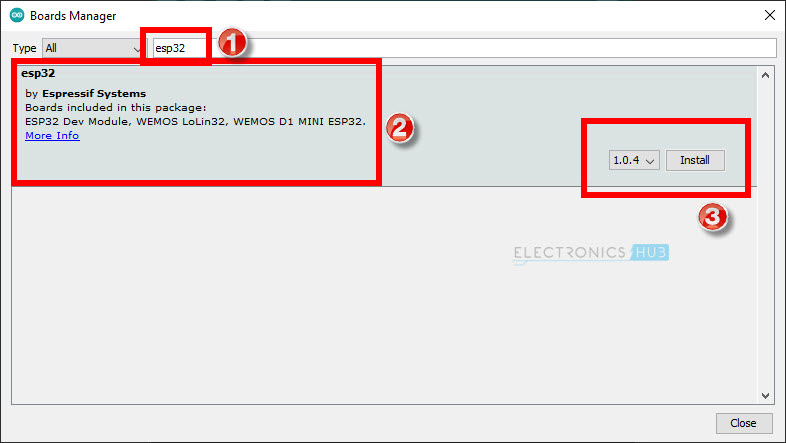
In the search bar on the top, type “esp32” and hit enter. You will get a result saying “esp32 by Espressif Systems”. Select this and click on install button. Arduino IDE will now download all the necessary files for ESP32 like boards, tools, programmer etc., from the internet.
Make sure your computer has internet connectivity. This might take a minute or two. Once the installation is successful, you can close the Boards Manager.
Selecting ESP32 Development Board
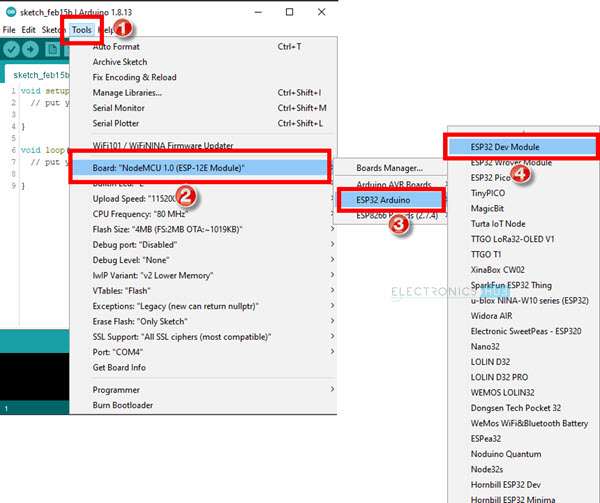
Now, in order to write programs for ESP32 boards, you have to first select the right board (the board which you have). To do this, once again go to Tools -> Board. You can see a new option called ESP32 Arduino added to the list of boards.
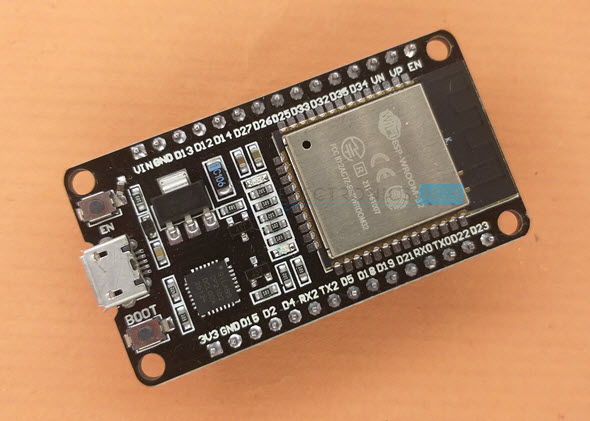
Hover over ESP32 Arduino and a list of ESP32 Board supported by Arduino IDE will appear. As I have a generic ESP32 DevKit, I selected ESP32 Dev Module. This board is applicable for most of the generic 30-pin ESP32 boards available today. In case you have a different board from a different manufacturer like SparkFun or WEMOS, select the appropriate board. Now, once again go to Tools menu and you can see the board options are changed and are now specific to ESP32 Board you selected. Do not change / modify any options as of now. I will specify the required changes whenever necessary.
Your First ESP32 Program
To demonstrate the working of ESP32 Arduino IDE installation, let us write a small program to, well, as you guessed, Blink an LED. My ESP32 Development Board has one user LED on-board and is connected to GPIO2 of ESP32.
If you have a generic 30-pin ESP32 Board, then chances are, your board will also have the LED connected to same GPIO. If your board doesn’t have any on-board LED, then you can still use the following program by connecting a 5mm LED to GPIO2 (marked as D2 on the board) using a 220 Ω current limiting resistor.
There isn’t much to explain regarding the code as all we are doing is Blinking an LED.
Programming ESP32 with Arduino IDE
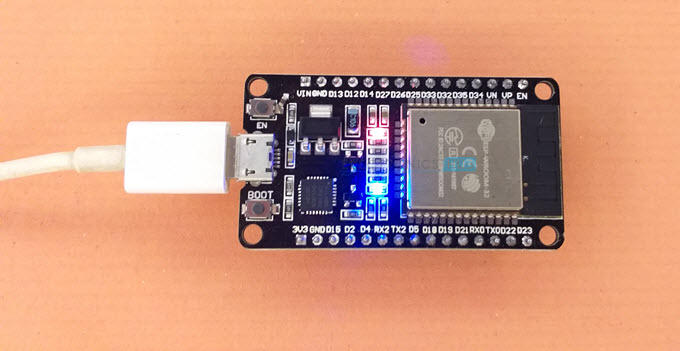
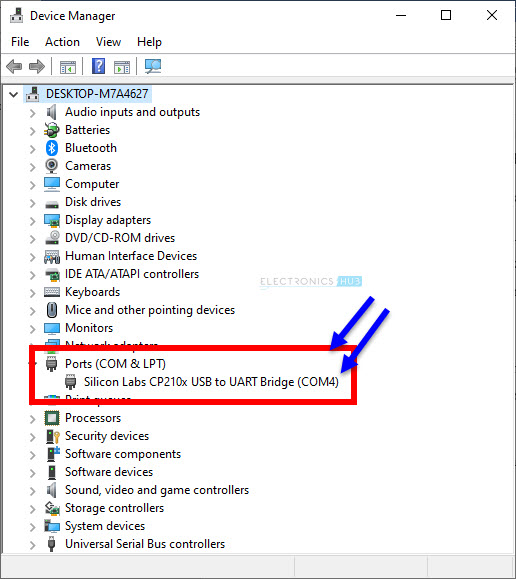
Now is the moment of truth. Connect a micro-USB cable to the ESP32 board and plug in the other end to a USB port on your computer. If your computer is running Windows 10 and is up to date, then you will not have any driver issues with respect to the CP2102 USB to UART Bridge. Troubleshooting Tip But if your computer couldn’t identify the device, then you have to install the Virtual COM Port Drivers from the official website of CP2102 (manufacturer is Silicon Labs). You can visit this link and download the appropriate driver for your operating system. If the device is recognized by Windows, then it will be assigned a COM port. In Windows OS, go to Device Manager and get the correct COM Port number.
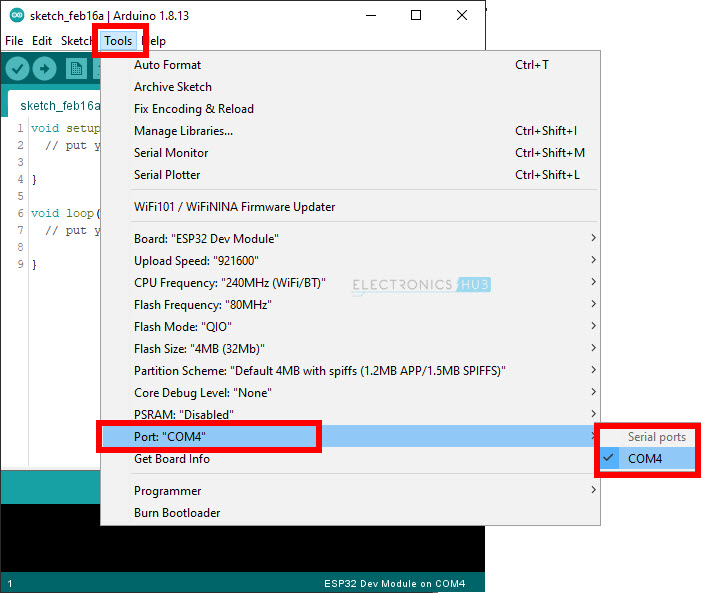
Now go to Tools menu in Arduino IDE and select the COM Port of ESP32. In my case, it was COM4.
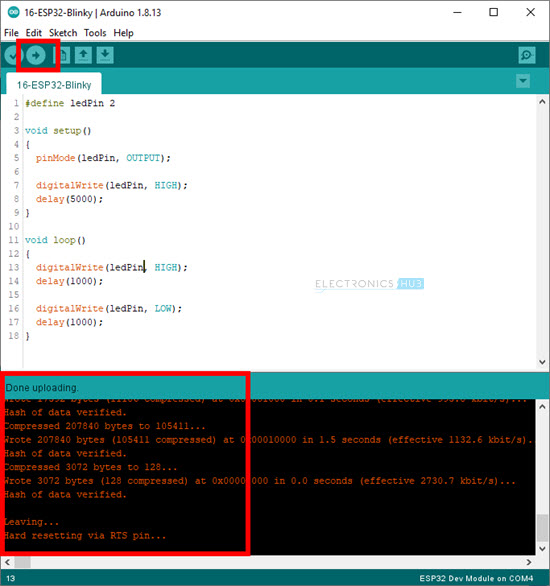
Type the code in Arduino IDE (or copy from above) and click on Upload button. If every thing goes well, then the Board itself will automatically put ESP32 in Programming Mode, upload the code to the on-board flash memory and also reset the microcontroller to normal mode.
You can see the LED Blinking.
Common Problems
The first problem with ESP32 Board which you might face is related to the CP2102 USB to UART Bridge Drivers. I already gave the link to download drivers. Another problem is not putting the ESP32 in programming mode while uploading the code. Close the Serial Monitor (if it is open) and click and hold the BOOT button on the ESP32 board while clicking on the Upload button on Arduino IDE. Once it identifies the chip, you can release the BOOT button and the code will be uploaded. To reset the microcontroller, press the EN button once.
Conclusion
A complete tutorial on Programming ESP32 with Arduino IDE. You learned how to install ESP32 Board in Arduino IDE, write your first program for ESP32 and upload the program. Retired, vet, just trying to stay out of the bars….LOL Kindly, Suggestions? Comment * Name * Email * Website
Δ





![]()